The Elbow Room Process

Elbow Room Process

All-In-One Service

Our all-in-one process allows you to enjoy your new space is effortlessly. We handle everything from architectural plans, foundation, permitting, design and installation. We also offer site preparation services and post-construction landscaping for a seamless experience.

Seamless Process 

First Visit
Site Visit 
Meet with an Elbow Room representative at your property. We'll discuss your options, determine the best location, and confirm the survey as current.  When you decide to move forward, we will send a service agreement for your review.  Once signed, we'll collect a 5% deposit along with your service agreement.
Duration: Single Visit
Feasibility
Feasibility Study 

A feasibility study is conducted to determine what is possible on your property. An up-to-date survey is required for a thorough evaluation. We'll order one if a current survey is not available.  This may extend the study by 1-2 weeks. 

Duration: 1 week 

Confirm Selections
Confirm Selections

You'll decide on the design details by choosing one of our six interior packages: Farmhouse, Luxe, Modern, Contemporary, Transitional, or Japani. You'll choose one our six color pallets to complement your interior style for trim, walls and ceiling, and accent room or wall.

Duration: Single Visit

Plan Prep & Permitting
Plan Prep & Permitting 

Architectural and foundation plans are prepared. An updated survey may be needed  to submit the permit.

This will extend the permit process by 2-4 weeks. 


The city will review the permit application and notate it for revisions. This may be repeated several times depending on the complexity of the project.

Duration:

Flex Room: Permits are NOT necessary.

Studio, Dwelling, & Flex with Bathrooms: Typically permitting is completed within 2-4 weeks. Some projects may take several months for approval depending on the number of revisions.

Construction
Construction

Once the permit and HOA applications are approved we will assign a team to the project. It may require a few weeks to start due to scheduling.


Construction is managed end-to-end by Elbow Room.  Quality comes first, followed by timeliness.

Duration:

Flex Room: 4-8 weeks

 Studio, Dwelling, & Pool House Bath: 12-16 week after permitting

Timeline Notes
Timeline Notes

Overall Completion Time 

Flex: 4-6 weeks 

Studio & Dwelling: 4-6 months plus permitting time


Completion times can vary due to many factors, and while we strive to meet our timelines, exact deadlines cannot be guaranteed. Construction naturally includes breaks between phases; this is factored into our schedule and is standard in the industry.

It's normal to see days when no work appears to be happening on site. Our skilled crews work in specialized trades and may not be needed every day. Delays due to weather, illness, or other unforeseen events are also common.

Rest assured, your project manager is closely monitoring all aspects of construction and is always available for any questions you might have. They ensure the integrity and smooth progression of your project.

All communication is tracked in our customer portal, which keeps everyone updated and ensures that any changes to the original plan are properly approved and documented. This helps maintain clarity and alignment throughout the construction process.
HOA Approval
If your home is governed by a Homeowners' Association (HOA), securing permission to construct your Elbow Room is crucial. Following your initial deposit, we will help you apply for HOA approval, which includes submitting the plans and, if needed, personally interacting with your HOA board.

We are able to accommodate most customizations required by your HOA. Should your requests fall outside our standard offerings, we will provide a detailed quote before proceeding, ensuring you know what to expect.
Permitting
Important Note
Elbow Room includes both the permitting service AND the permitting fees as a part of our sales price.  However, additional charges may apply for permitting fees that are out of the typical scope of work.  Examples: Sidewalk permits, environmental permits, etc.  

These are the steps we take to get a permit for your ADU before construction can begin:

Submissions
First, we will submit the ADU plans to your local building department. These plans include detailed drawings and specifications of the construction. 

Review
The local building department will review the plans to ensure they meet all zoning and building codes. This process checks that your ADU will be safe and compliant with local regulations.

Feedback & Corrections
If there are any issues with the plans, the building department will provide feedback, and we will make the necessary changes to move forward. This can go back and forth until everything is in order.  

Approval
Once the plans meet all the requirements, the building department will approve the permit. This approval means we can legally start construction.

Inspections
During construction, inspectors from the building department will visit your site to ensure the actual building matches the approved plans and adheres to code.

Important
Please remember, the time it takes to get a permit can vary greatly depending on your local area's workload, the complexity of your project, and additional permits per municipality. We will proceed with the permitting process when we receive your first payment.   
Site Preparation
Before the installation of your Elbow Room begins, it’s important to prepare the site to ensure a smooth construction process:

Clear the Site
Start by clearing the area where your Elbow Room will be set up. Home Rooms don't need level ground as they are built on pier-and-beam foundations, which are suitable for sloped sites and help minimize future settling issues. Wiggle Rooms may require leveling, because they are built with a 4" slab on grade base.

Remove Obstructions
Clear any trees, branches, roots, and vegetation that might interfere with the build. 
  • Relocate or remove any existing structures like swing sets or sheds.
  • Adjust any sprinkler heads and pipes in the build area. Ensure no sprinkler heads are directly underneath or aimed at the Elbow Room.

Underground Systems
  • During the initial site visit, you’ll work with your Project Manager to outline the path for electrical and Ethernet cable trenching from your Elbow Room to your house.
  • Mark any underground cables, plumbing, or sprinkler lines along the proposed trench path with construction flags.
  • Clear these marked areas by mowing, removing plants, or digging out soil to make the systems easily visible.

Prevent Damage
  • Elbow Room will contact 811 to identify and mark underground utilities before any digging starts. However, we also rely on your preparation to prevent damage.
  • While all precautions are taken, any damage to underground systems during trenching is the homeowner's responsibility, and repair costs will be charged accordingly.

Pre-Installation Preparations 
  • If you have a sprinkler system, inform your service provider about the upcoming work to prepare for potential repairs.
  • We will need access to your driveway 1-2 days before the installation to deliver the materials via a third party.

By following these guidelines, you can facilitate a smooth installation of your Elbow Room, reducing the likelihood of delays and additional expenses. While the construction of your Elbow Room includes all necessary building aspects, preparing the site is your responsibility as the homeowner. 

If you are unable to manage the site preparation, let us know, and we will provide a quote to handle it for you so that construction can start without delay.
Design Consultation
The selections process for your Elbow Room ADU is designed to be straightforward and enjoyable, helping you choose the design components that best suit your style and needs.

Tailored Design Packages
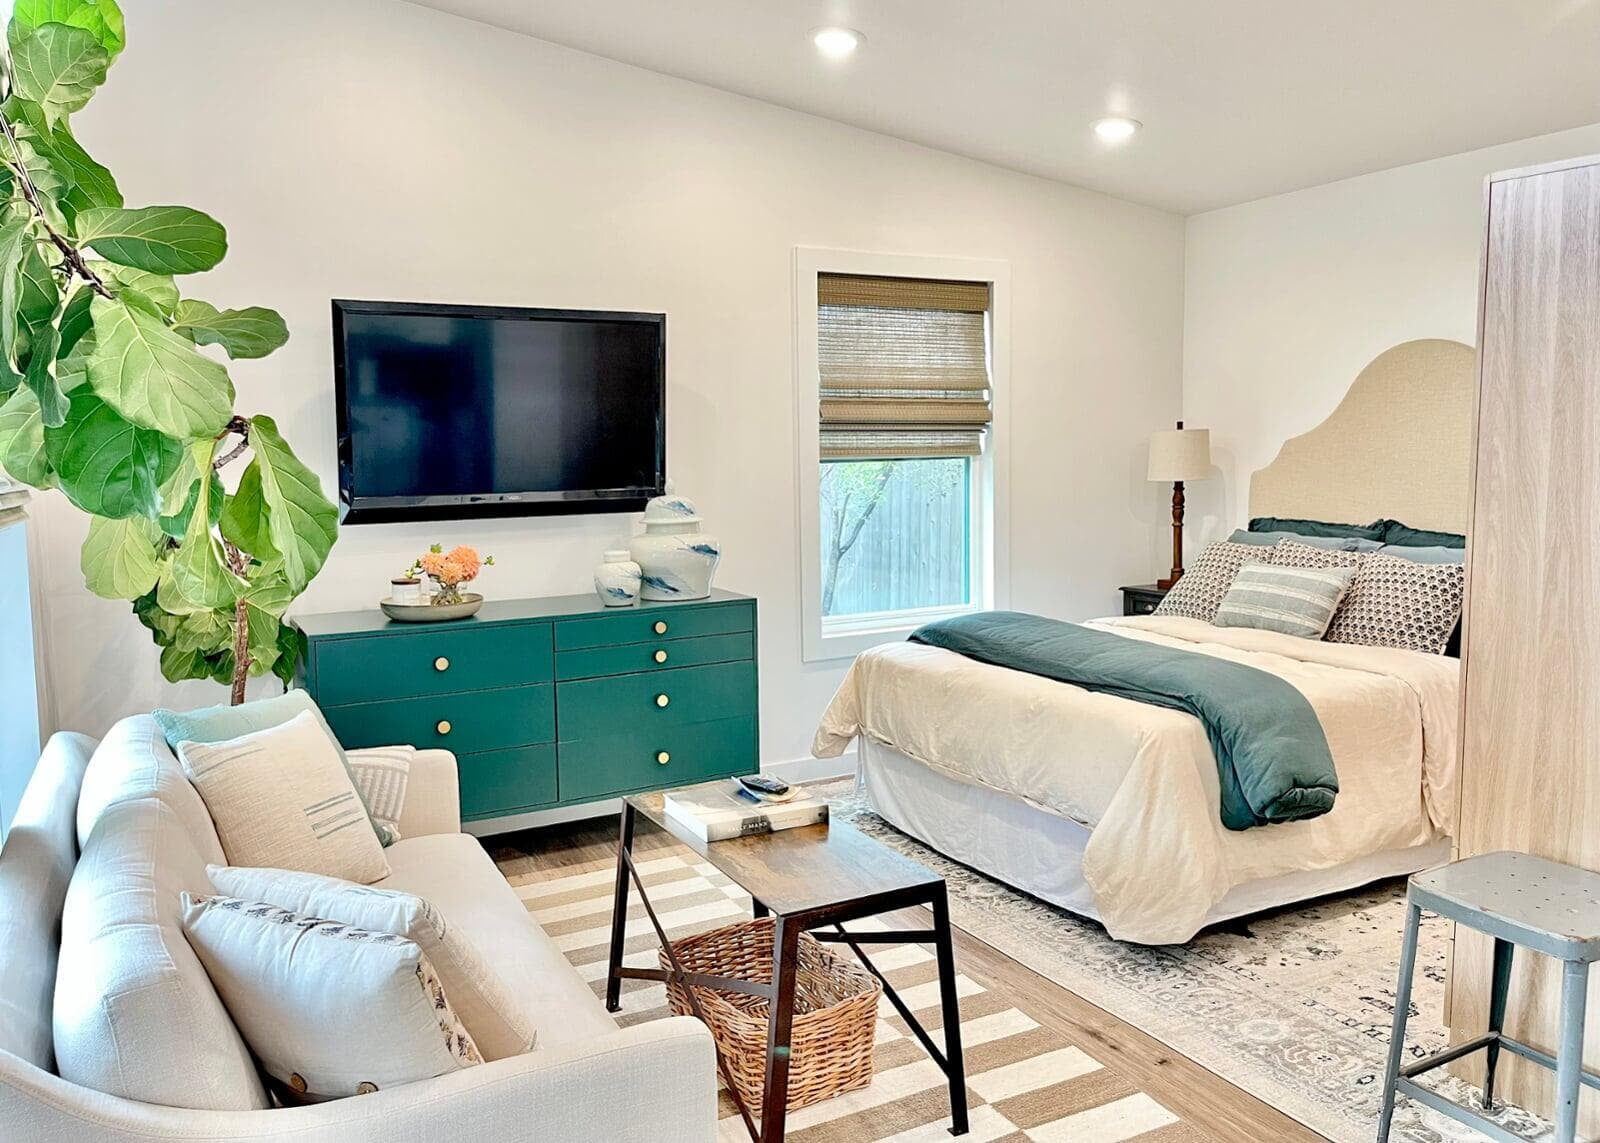
To simplify your decisions and ensure a cohesive aesthetic, we offer six specially curated design packages. Each package has been thoughtfully assembled by Judith de Masters at the award winning interior design company Up & Co. They provide a harmonious look and feel, making it easier for you to envision the final setup of your Elbow Room.  Choose from Farmhouse, Luxe, Modern, Contemporary, Transitional, or Japandi.  

Flexible Choices 
While our design packages offer a streamlined approach, we understand the importance of personalization. You can purchase time with our award winning designer, Judith de Masters from Up & Co, to cultivate a custom look that is unique to you.  

This process is designed to make the selection of your ADU’s design components as seamless and stress-free as possible, with options to satisfy both those who prefer a guided approach and those who wish to customize more freely.
Active Construction
Active construction of an Accessory Dwelling Unit (ADU) involves several distinct phases, each critical to the successful completion of the project. Here is a concise breakdown of these steps:

Phase 1: Foundation and Site Work
  • Preparation: We'll work with you to ensure the site is clear and ready for construction. 
  • Foundation:  Depending on the design, lay a slab foundation. This phase includes installing underground utilities. 
  • A city inspector will physically examine the foundation and issue a pass to ensure that the structure is of sound quality that is built to code.  Once this is completed we will move onto the next phase.

Phase 2: Framing 
  • Structural Framing: Erect the walls, floors, and roof structure. This defines the shape and size of the ADU.
  • Roofing: Install the roofing material, whether shingles or metal, to ensure the structure is watertight.
  • A city inspector will physically examine the frame and issue a pass to ensure that the structure is of sound quality that is built to code.  Once this is completed we will move onto the next phase.

Phase 3: Exterior Finishes 
  • Siding: Apply exterior siding materials, such as wood, stucco, or fiber cement, to protect and define the look of the ADU.
  • Windows and Doors: Install all exterior windows and doors, securing the building envelope.

Phase 4: Interior Systems  
  • Plumbing, Electrical, and HVAC: Install all internal systems, including pipes, wiring, and heating/cooling units.
  • Insulation: Properly insulate walls, floors, and ceilings to ensure energy efficiency.
  • A city inspector will physically examine the interior systems and issue a pass to ensure that the structure is of sound quality that is built to code.  Once this is completed we will move onto the next phase.

Phase 5: Interior Finishes 
  • Drywall: Hang and finish drywall to form the walls and ceilings.
  • Painting: Apply paint or other finishes to interior surfaces.
  • Flooring: Install flooring options such as tile, hardwood, or carpet.
  • Fixtures and Cabinetry: Complete the interior with the installation of cabinets, countertops, light fixtures, and appliances.

Phase 6: Finalization and Inspection 

  • Final Touches: Perform final installations like trim work, hardware, and any additional detailing.
  • Inspection: A city inspector will physically examine the structure in its entirety  to ensure compliance with local building codes and construction standards.
  • Final Approval: Obtain the final approval or certificate of occupancy or certificate of completion from the local authorities.

By carefully managing each of these phases, the construction of your ADU will be streamlined and efficient, leading to a high-quality finished product.
Payment

Initial Financial Commitment                                                                                                       

  • To hold your spot 5% deposit is required. This deposit will be credited toward your first payment. If you decide not to move forward, your deposit will be refunded less any expenditures incurred.
  •   Feasibility study will commence.


Structured Payment Plan

  • Material Mobilization                                                                                                   The initial major payment, accounting for 30% of the total cost, is due when construction materials are mobilized.
  • Foundation Completion                                                                                        Another 30% payment is required upon the completion of the foundation.
  • Post Rough-In Stage                                                                                                      An additional 30% is due following the rough-in phase.
  • Completion and Occupancy                                                                                        The final 5% is due at project completion, before occupancy, to activate the warranty.
Out of Scope Work

Permitting and Architectural Plans

All necessary plans, universal permits, and associated fees are covered by Elbow Room, streamlining the process and reducing administrative burdens for you. 

Environmental, sidewalk, and city/neighborhood specific permits are outside the Scope of Work and will be quoted accordingly.

Managing Additional Costs
The total cost of most Elbow Rooms is unchanged from the initial price quote, but there are circumstances that are outside of the common Scope of Work. 
Quotes for Out-of-Scope Work                                                                                             Any work that falls outside the original project scope will be quoted, approved, and signed off with payment before commencement.

Complex Conditions                                                                             
Adjustments for complex site conditions, such as navigating obstructions or dealing with tough terrain, will incur additional expenses that will be quoted upon discovery.  A detailed inspection of your site will help us determine these conditions prior to construction, however we can't predict every mitigating circumstance.
  • Change Orders                                                                                                                    Changes to the project scope must also be approved and signed off, ensuring transparency and agreement before any additional work begins.

Construction Specifics
  • Trenching and Electrical Hook-Up                                                                                     Trenching for electrical services and 75 linear feet of electrical hook-up are included in the price of your Elbow Room. 
  • Plumbing                                                                                                                                 Interior plumbing is included with units that have bathroom, kitchen, or laundry. Water, sewage services, and hook-up will be quoted after a preliminary site visit by our Project Manager.  Distance and difficulty are determining factors. We'll use existing trenching whenever possible to prevent further costs.

Slope Adjustments
  • Foundation Adjustments for Slope                                                                                                            4 - 6 inch slab-on-grade foundation is included.  Pier and beam is an option for yards that have a slope.  A thicker slab is another option.  We will provide a quote for yards that require a foundation beyond the Scope of Work. 

Note: 
There may be circumstances beyond those named that are out of the Scope of Work. These will be cited before construction begins if possible.  Unexpected circumstances may occur during construction and will be documented and quoted by change orders.  

FAQs

Please read our Frequently Asked Questions section for quick answers!

Financing

Elbow Room is happy to direct you to one of our partners at Frost Bank.  They are familiar with our business model and offer many solutions for financing your project.

Contact Us

We'd love to answer your questions!  Please let us know a little about your project and we will give you a call to answer any questions. If you prefer to email, we can do that, too.  No obligations, just conversation.